
Have I mentioned I have a little princess? She’s got an extensive imagination which I love to foster by making her all the princess dresses. If you’ve got a little one who loves Elena (or all the princesses) too then this is the post for you!
Princess Elena of Avalor is a TV series through Disney that my little princess just loves. I support this princess because its got a positive, strong, thoughtful female themes to the shows. And I love expanding her understanding of cultures, Elena features Hispanic and Latin. So when she requested this as her next princess dress, how could I say no?
Lets start with the fabric. I love making princess dresses from the faux sparkle fabric. It has the fancy look of sparkles (its digitally printed) but its easy to work with and soft to touch since its just a regular cotton lycra material. Its perfect for play dresses because its durable too. If your princess is anything like mine then you know that these dresses will get worn often, to school, the grocery store, to bed, they will get food on them, and get muddy (Yep! Even princesses get muddy!). These sparkles are from Pink Zeppelin Boutique. The main piece of this dress is “Watermelon” in cotton lycra, the ruffle/flounce is “Punch” in Double Brushed Poly (DBP). The owner, Yvi, was so nice in helping me find the perfect color match for Princess Elena!! The liner is a regular tan CL I had in my stash
I used two patterns to make this dress. The top portion is the Camila by M4M. Since the Camila is designed as a swim suit, size up. I sized up two sizes from where my little princess measured (mostly because she’s going through a major growth spurt at the moment, sizing up once should be fine!). I used view A without straps, but you could certainly include those. The skirt is based from the *FREE* Chloe Skirt by M4M. I love when I can use a free pattern!
Lets start with the top. When cutting fold your pattern piece at the bottom marker, since we only need it as a top to a dress we don’t need to make the bottom part of the bathing suit.
The only modification I did when making the Camila top is to simple sew the side seams, so I skipped a lot of steps (no lining, no bottom to sew, etc). I constructed the neckline and flounce all according to the directions. Once thats done, set it aside, we will come back to connect it to the skirt.

I used the regular Chloe pattern piece for the back of the skirt. I also used the regular Chloe pattern piece for the front liner.
Hem the bottom of your lining piece only.
I folded a piece of paper (I highly recommend getting some butcher paper to practice your hacks on, and its great for tracing multiple sizes of the same pattern, way more affordable than printing multiple times) onto of the Chloe pattern and traced it, so when I opened the paper I had a complete pattern piece, no needing to cut on the fold. Next I drew the slit I wanted to cut out of the front. You’ll notice I made it off center (the fold is the center). I just guessed and drew a small, gentle curve at the bottom. I left a two inch gap between the two pieces (I wanted the ruffle to overlap but not the skirt pieces).

Measure the rounded curve side that you just created. Next measure the bottom of the back skirt. These are for the making the ruffle. For more details on making a ruffle check out my previous blog post, Ruffle All the Things (I explain the math in more detail there).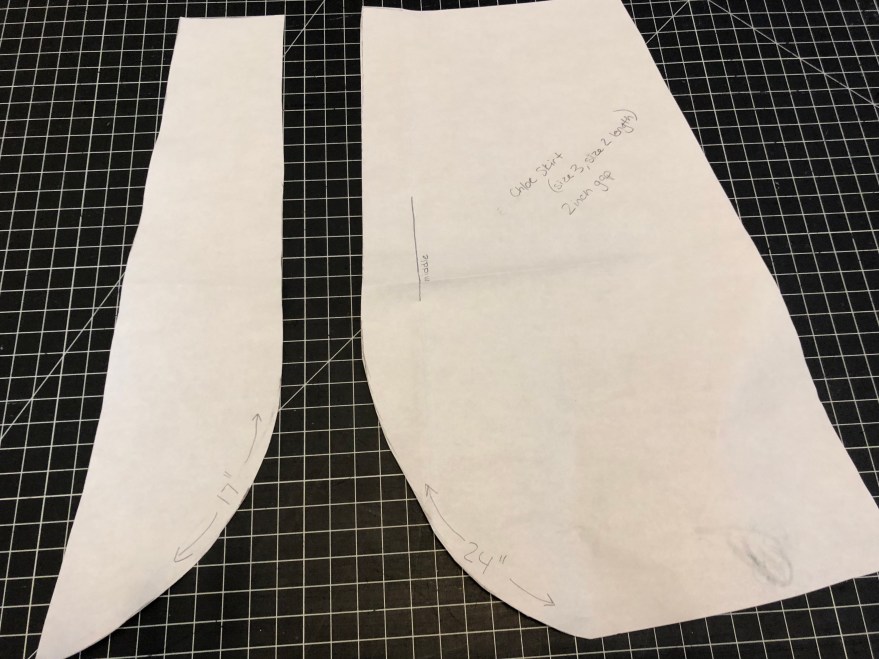
I made the length of my ruffle 5 inches (so it will be 2.5 when attached). I cut three pieces to the ruffle, that way the seams all line up. The paper pattern piece I made on one sheet and marked where to fold it for each ruffle. Don’t forget to fold your fabric so your ruffle is twice the length!
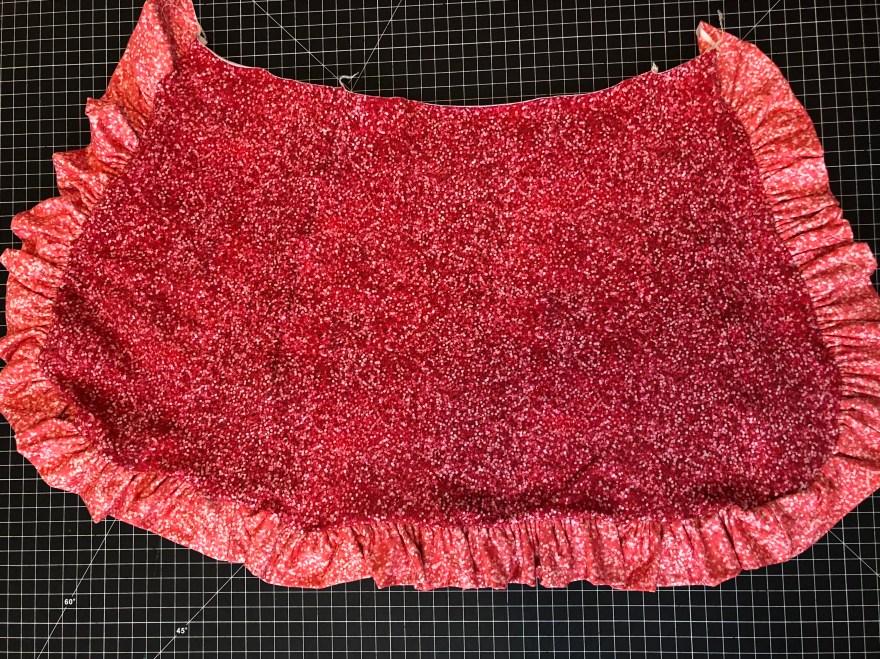
Sew the small sides together to make one continuous strip (not a complete circle, just a strip!). Be sure that the back ruffle piece is in the middle!!!!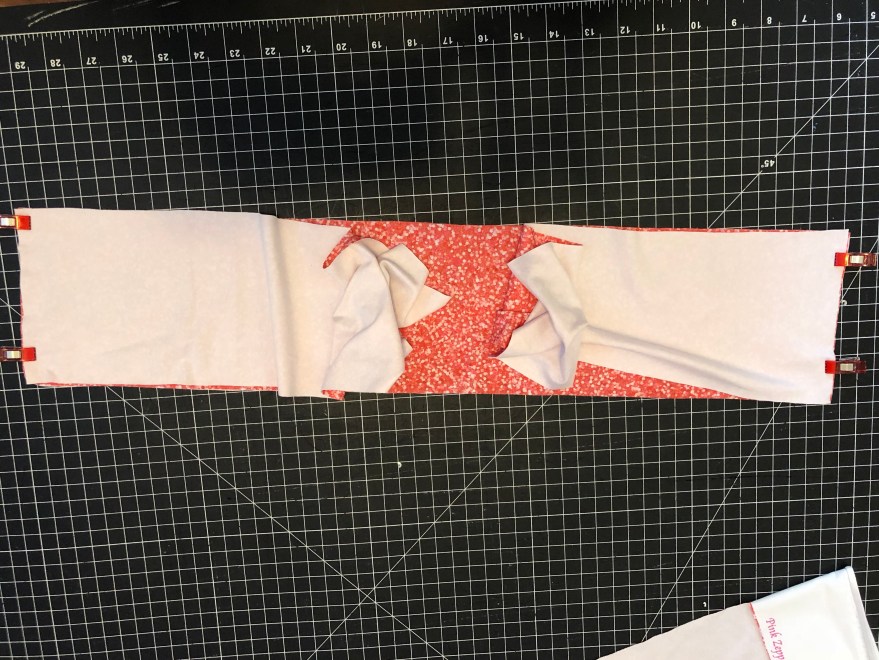
Then fold in half with wrong side together along the long edge. It will be very long!
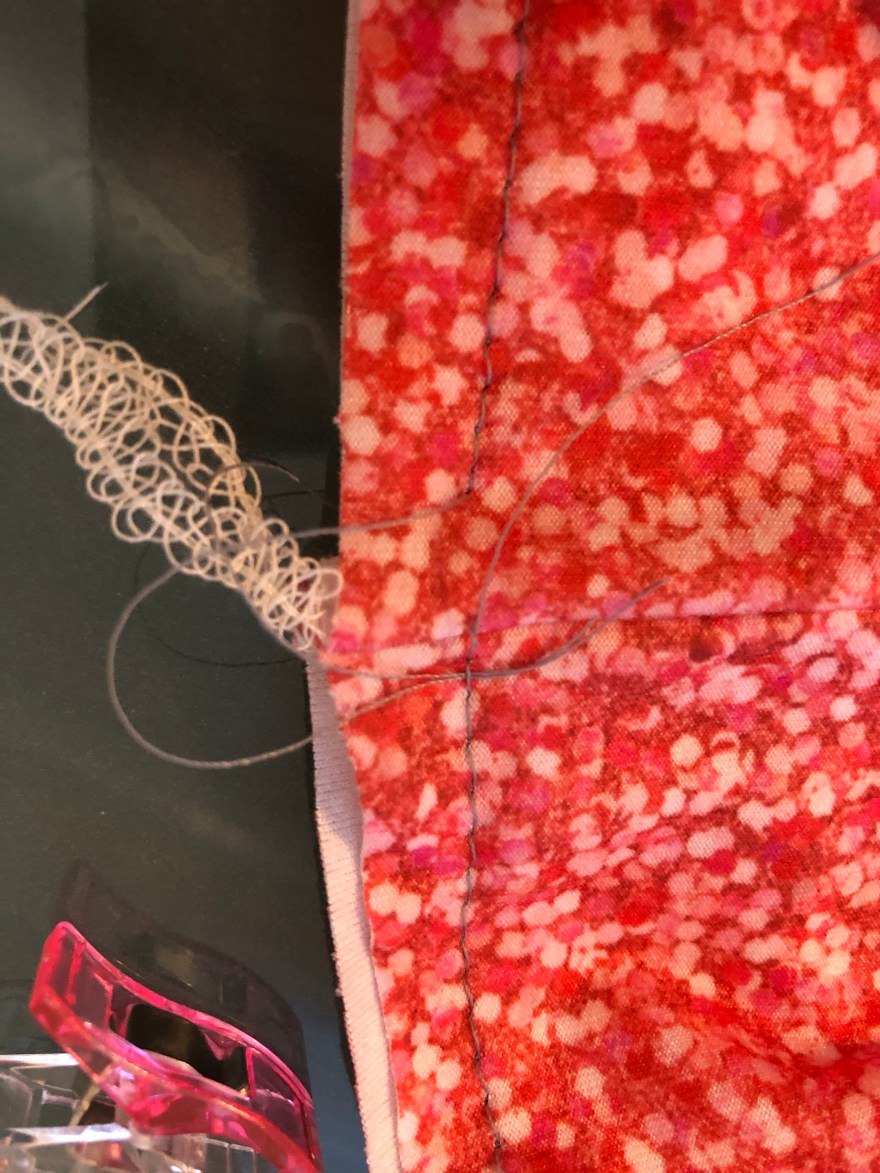
Now put a basting stitch long the raw ends. I like to stop my basting stitch at each seam, that way it makes the pieces slightly more manageable.

The main pieces of your skirt right sides together, sew the side seams. (I left my lining piece off for the this picture so you could see how it would look, the lining piece would go right side down on top of the cutout pieces).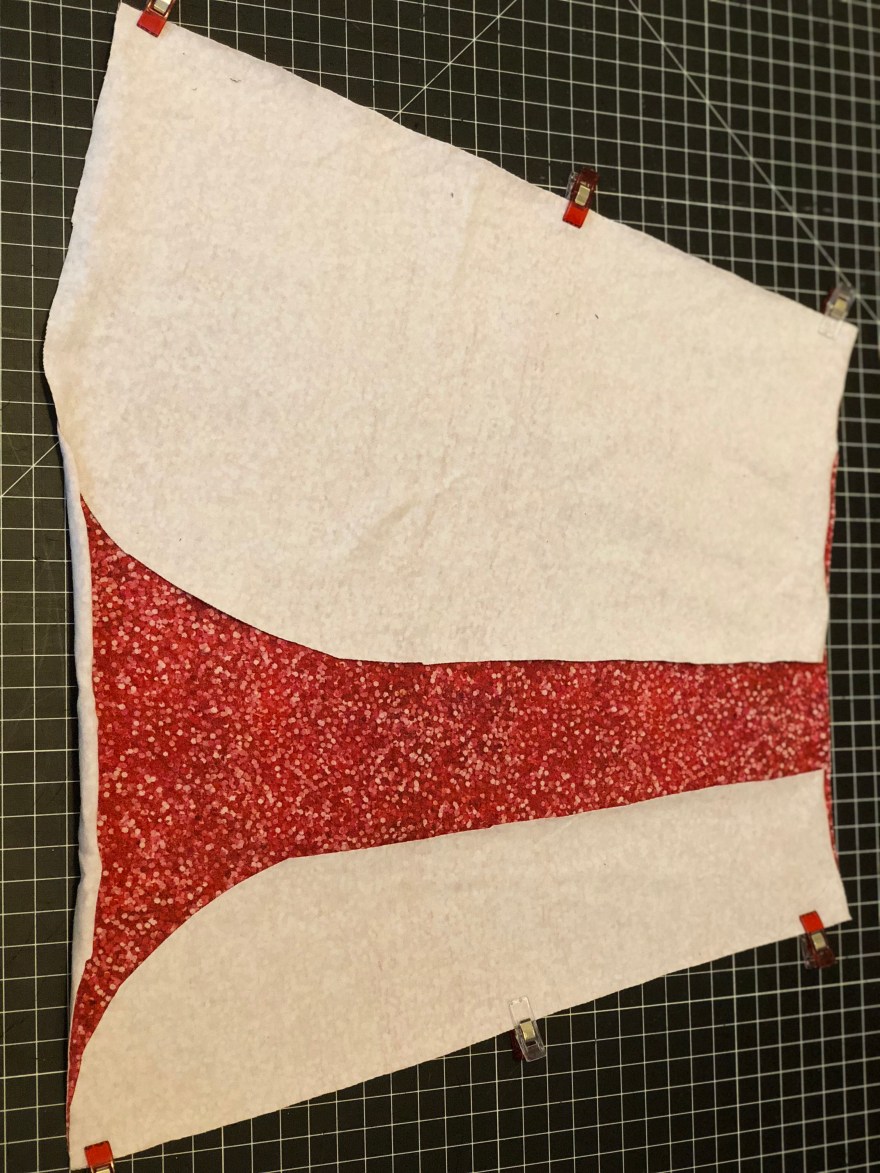
Matching the seams clip your ruffle along the bottom edge of your skirt. Sew them together.

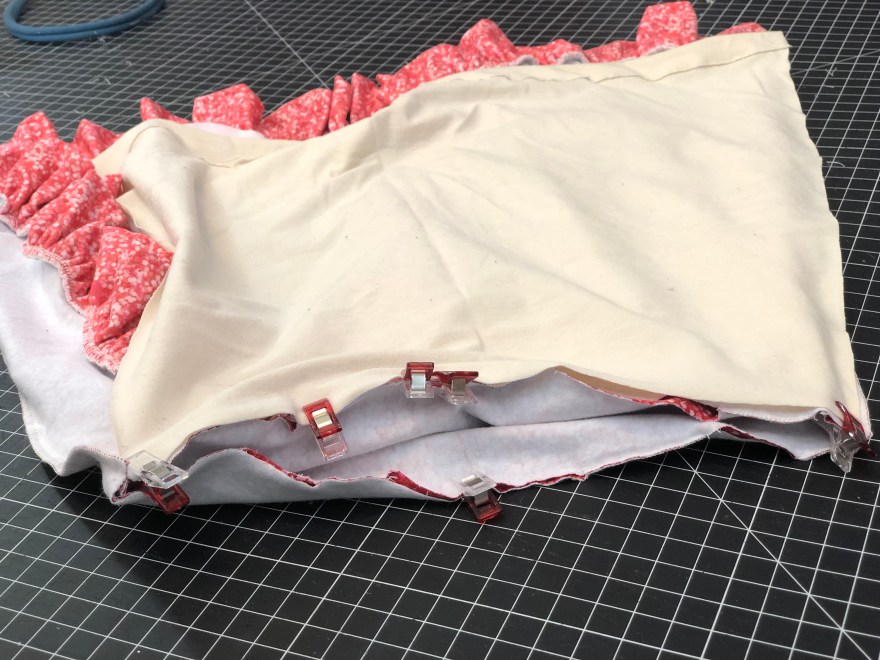
Almost done!!! Now to attach the skirt to the bodice! Matching right sides together (I find it easiest to have the bodice right side out and turn the skirt inside out, then pull the skirt over the bodice). Be careful about where your ruffle pieces overlap. I used extra clips around this area.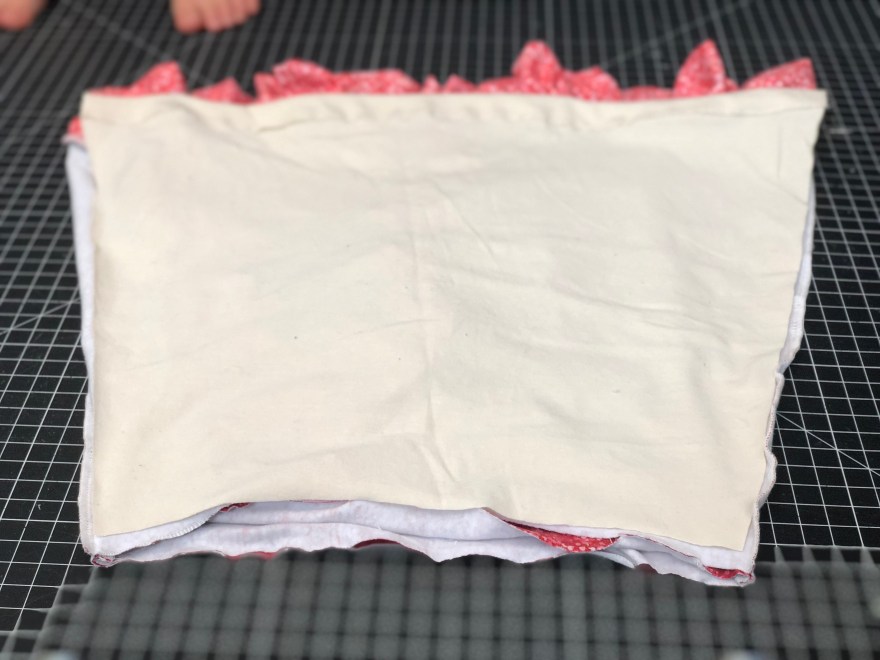
La Magnifica! Princess Elena is ready to play!


Follow the blog so you don’t miss you (or your little’s) favorite princess!!
