
So you’ve got a little princess too? If it doesn’t twirl or look “fancy” then my little Miss won’t wear it. We’ve recently moved to cooler weather and therefor she can’t get away with wearing a dress everyday like we did when we lived in Southern California, USA. So I’ve resolved this dilemma by adding a ruffle to almost everything!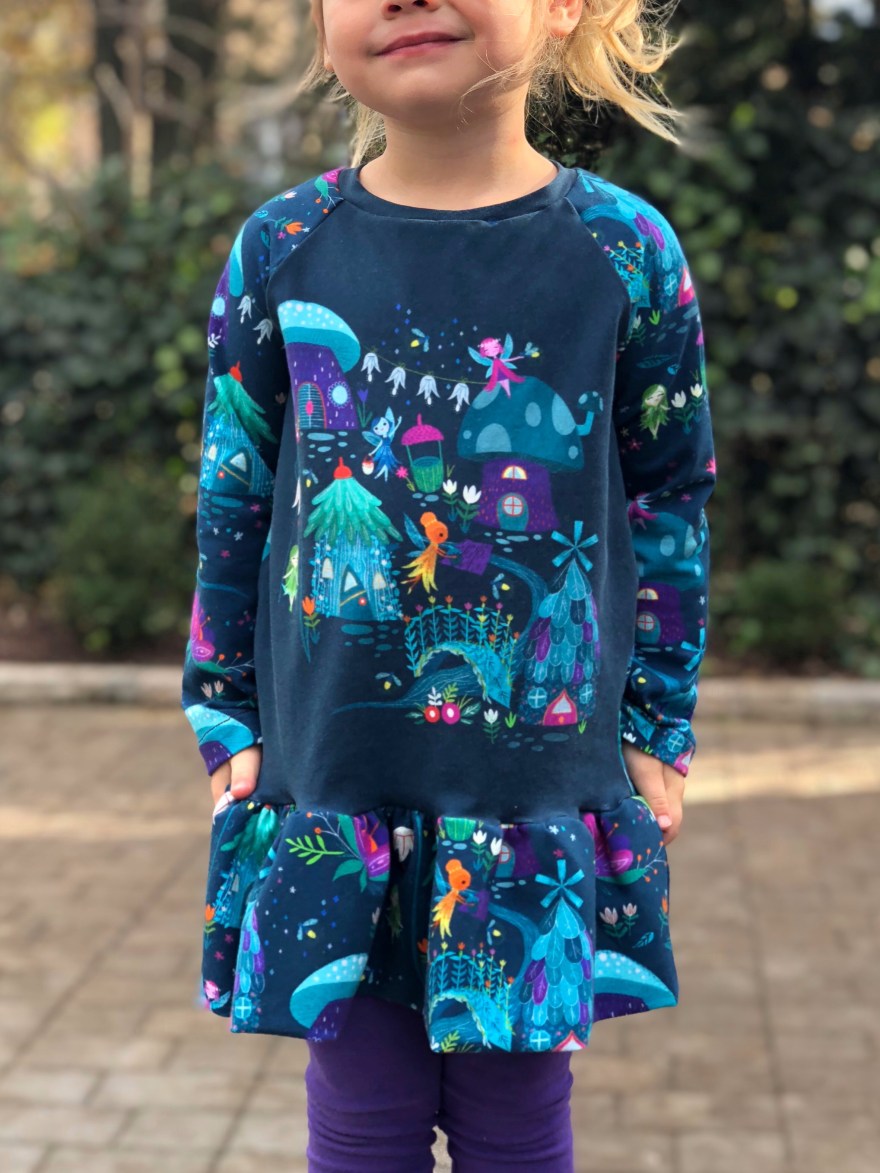
The easiest way is to add premade lace trim. I’ve gotten most of mine from Amazon, Etsy or little boutique shops. These can be a bit pricey and you may not have the right color for your project. When it does work though, its adorable (and easy)! Here are links to black trim and white trim I’ve ordered and liked.


*** Heres an example of the white trim attached to a shirt. This fabulous faux glitter fabric in rose gold is from Snow Owl. They have a wide range of prints and solids for adults and kids.
Another great option is to make a fabric ruffle. I always try to use scraps #savemoney, sometimes I just *need* the color of a specific fabric. So thats what I am going to explain here.
There is some math involved, but I’m pretty loose about specifics (especially when using scraps). The only thing I really stick to is the minimum with of the ruffle. It won’t look “ruffly” enough if its less then twice the width of bodice. If you have a thinner fabric (like a sweater knit, or rayon spandex) then you may want to make it three times the width because you will want a nice full gather. For this project I used a custom cotton lycra. For cotton lycra usually twice the width gives a great look. Sooo what am I talking about when I say twice and three times the width? Let me explain
Take your body piece. Since I’ve been trying to make my little miss wear warmer clothes I’ve been starting with a raglan shirt. I like the Mega Max from Max and Meena. There are SO many options in the pattern, but for this project I just use the very basic version of the hoodie.

*** This fabric is cotton lycra from MK Fabrics.
Make the hoody according to the pattern, but stop before hemming the bottom. Now measure the bottom width of the hoody piece. I’ll call this number B and multiple by 2. So your math problem looks like
B x 2 = width of ruffle
If you have a thinner fabric (and want a fuller ruffle) then multiple by 3. The math problem would look like
B x 3 = width of ruffle
Great! Now we need to figure out how long you want your ruffle to be. Again, I’m loose on the math with this since it’s mostly personal preference (and if I’m using scraps then its usually determined by how much fabric I have). I usually like about 5 inches (I make my little one a size 3 or 4 usually), so I cut it 10 inches so that I can fold it (no hemming this way!).
Now you’ve figured out the dimensions, go ahead and cut! Cut two (one for the front and one for the back). ***You’ll notice mine turned out a little longer on the width. I had just a little bit more of the fabric so I just included it rather then cutting off a strip to get exactly twice the width.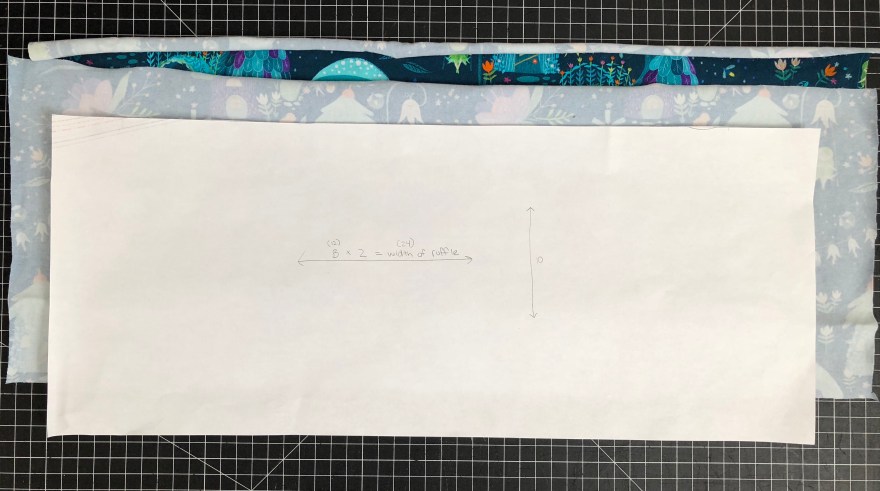
Fold your ruffle right sides together and stitch together the short sides so you have one long continuous piece.
Fold your ruffle wrong sides together along the long edge. (you can iron here if you want, it will make this fold stay easier)
Next put a basting stitch along your long raw edges. I like doing two stitches, one for each side (so I stop at each seam). I set my sewing machine on a regular stitch, the longest it will go. Some people use two rows of basting stitches. I don’t because #lazy and #momminghard means I have limited sewing time.

Now gently pull your fabric so it bunches. Try to make sure your bunches are even, this will give it a nice looking gather.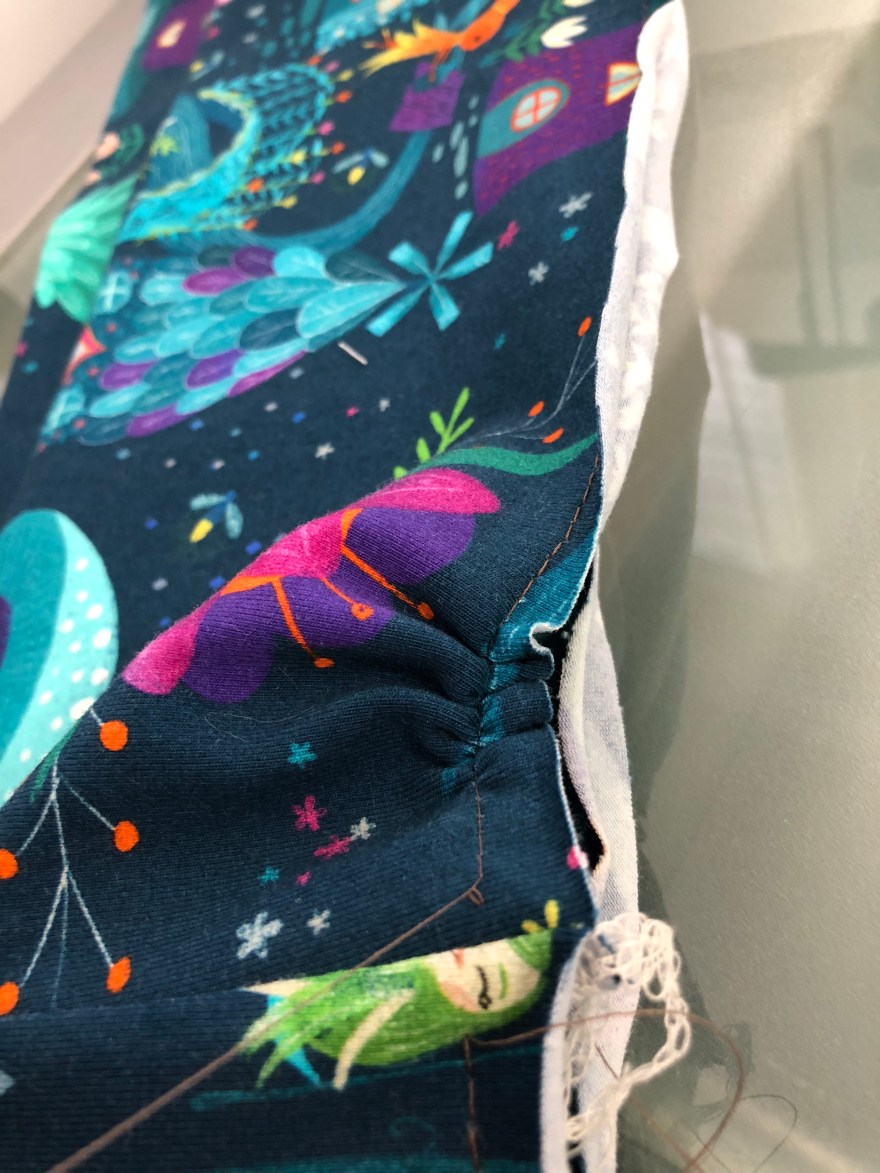
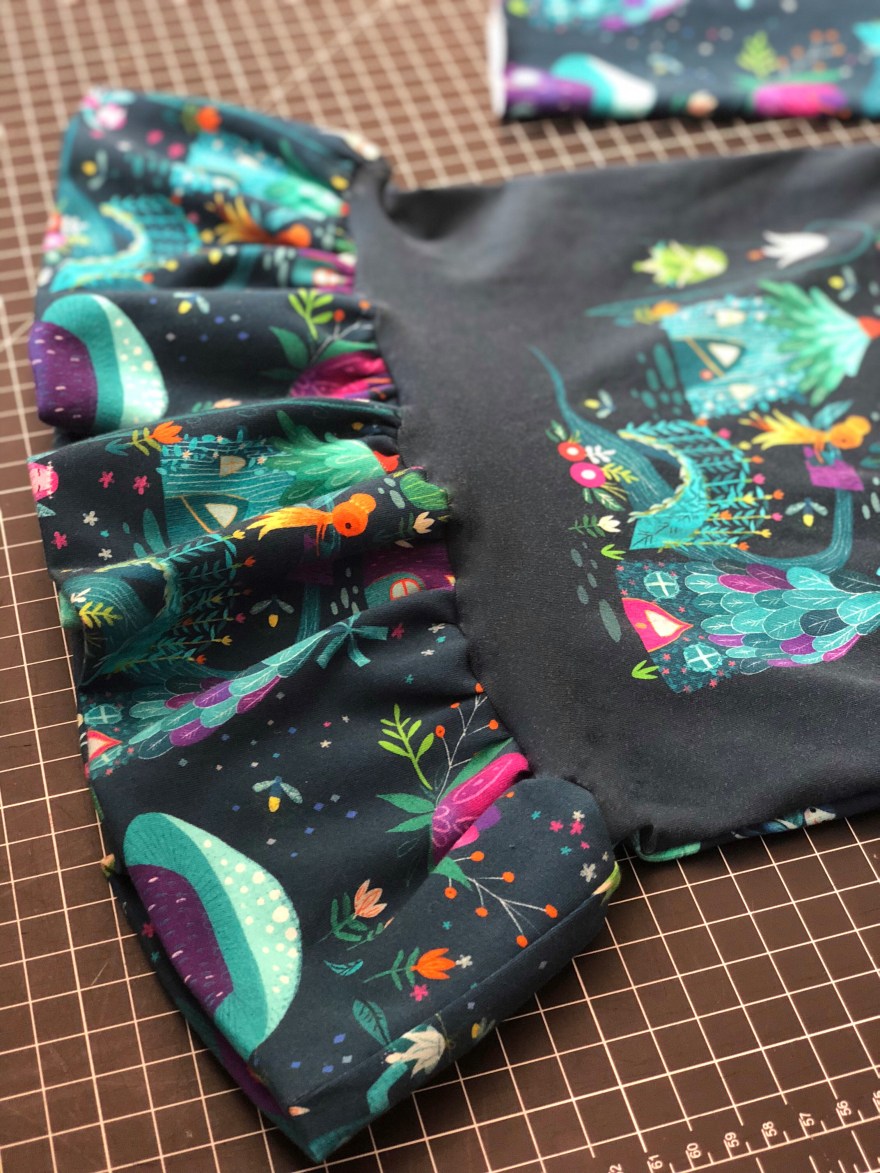
Place your gathered ruffle on top of your body piece, lining up the side seams. Stitch your ruffle raw edge to your bodice, again try to keep the bunching even along the way!

Your princess thanks you!!!! Although it takes a little more time and fabric to add a ruffle it saves me LOTS of time and fights getting the little Miss dressed each morning #worthit
#MomBonus since the ruffle makes it more tunic length it will likely fit the following year as a shirt!!!


Excellent!! Love your explanation!
LikeLike