There are a few basics to sewing in order to make a clothing item you would want to wear. A big one is being able to put on bands. Banding is often used for necklines, arms, bottom of tops, cuffs and waistbands of pants. Its in everything!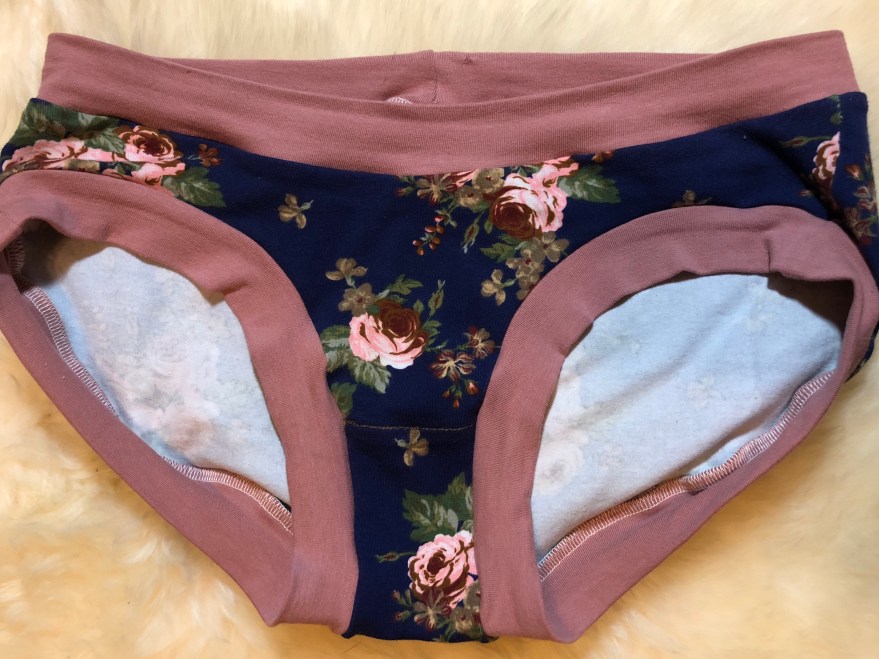
Some of the benefits of practicing this skill are in making undies. You get to practice three bands for each pair (waistband, and two leg bands). Making a pair of undies uses a smaller amount of fabric compared to trying to make a shirt or pants. Since undies aren’t really visible to most (your partner if they are lucky) if they don’t come out perfect you’ll be more likely to still wear them! I know when I first started sewing (and even now sometimes, although thankfully I can “save” most things) I hated throwing something away that I spent time (and fabric) trying to make when I messed up.
I pattern I like best is Bunzies by SUAT as it gives the most fit options. My preferred fit is the full coverage option. I like that it fits my entire booty (no ready to wear undies have ever done this before!). Which is perfect for being active with littles without getting a wedgy.
I raised the front curve of the leg bands so that it fits more like traditional underwear versus the pattern which fits more like a boy short style. I did this by trimming up the curve in the front as shown in the picture below. I made several pairs before I got the curve perfect for me. Again this is a great pattern to start with because it gave me practice with altering a pattern and I didn’t have to use much fabric. Each pair was still useful, even if the fit wasn’t perfect… yet
Other then the small modification I made to the front leg curve I have always made this according to the pattern. Whenever I’ve been asked for tips with learning to sew I always send people to this pattern. I also know that most people can follow the pattern (fairly) easily up to the bands. Bands tend to be tricky for most people who are learning to sew. I will say that even though I sew a lot I still follow all these steps when attaching bands because they are such critical elements to most clothing items.
First things first, take each band and sew the short ends together so that you have one continuous strip. Then we will quarter our bands.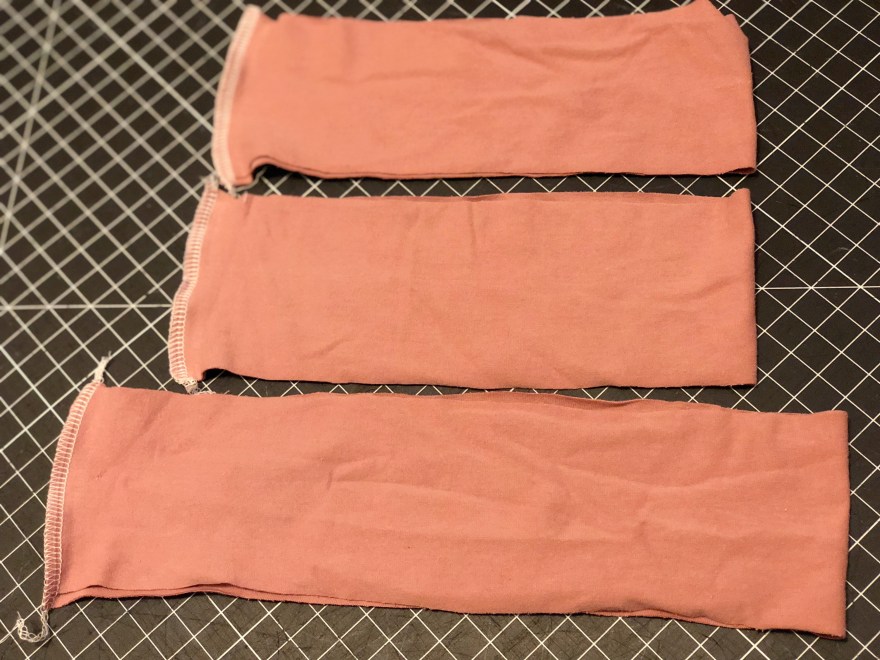
I always start with the serged seam and bring those ends together and clip. *I like to use different color clips so that its easy for me to match the band to the main body piece. I always use a red clip for my serged ends.
Next is finding the front of the band. Fold the wrong sides together (you can iron this seam if you want, it makes it slightly easier to attach, I don’t do this anymore as its an extra step I don’t necessarily need since I’ve attached SO many bands). 
Then lay your band down with your serged seam on one end, the other end will be your front. I like to mark my front with a pink clip.
Match your serged seam and front piece together, lay it down. The two ends will now be your half way points. I like to mark these with a purple clip. Repeat this step for each band.
For the leg bands take the body piece. Find the serged seam of the leg band. Mark this with a red clip.
Lay your body piece down, and the other fold will be your front. Mark this with a pink clip.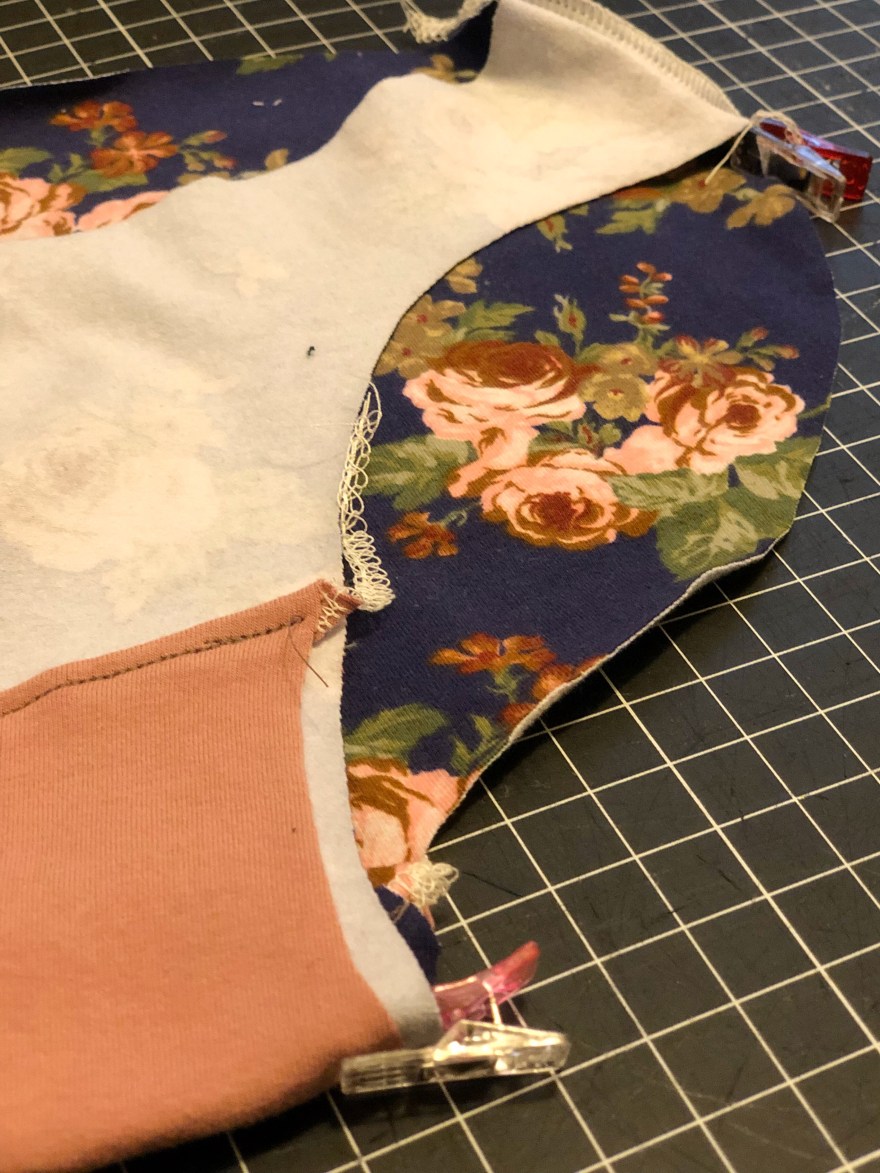
Match your serged seam with your front clip and lay it down. Where the fabric folds will be your half way points. Mark these with purple clips.
To quarter the waistband mark each serged seam (same one we did the other end with a red clip for the legs) with a clip (these will now be the half way marks so I use purple).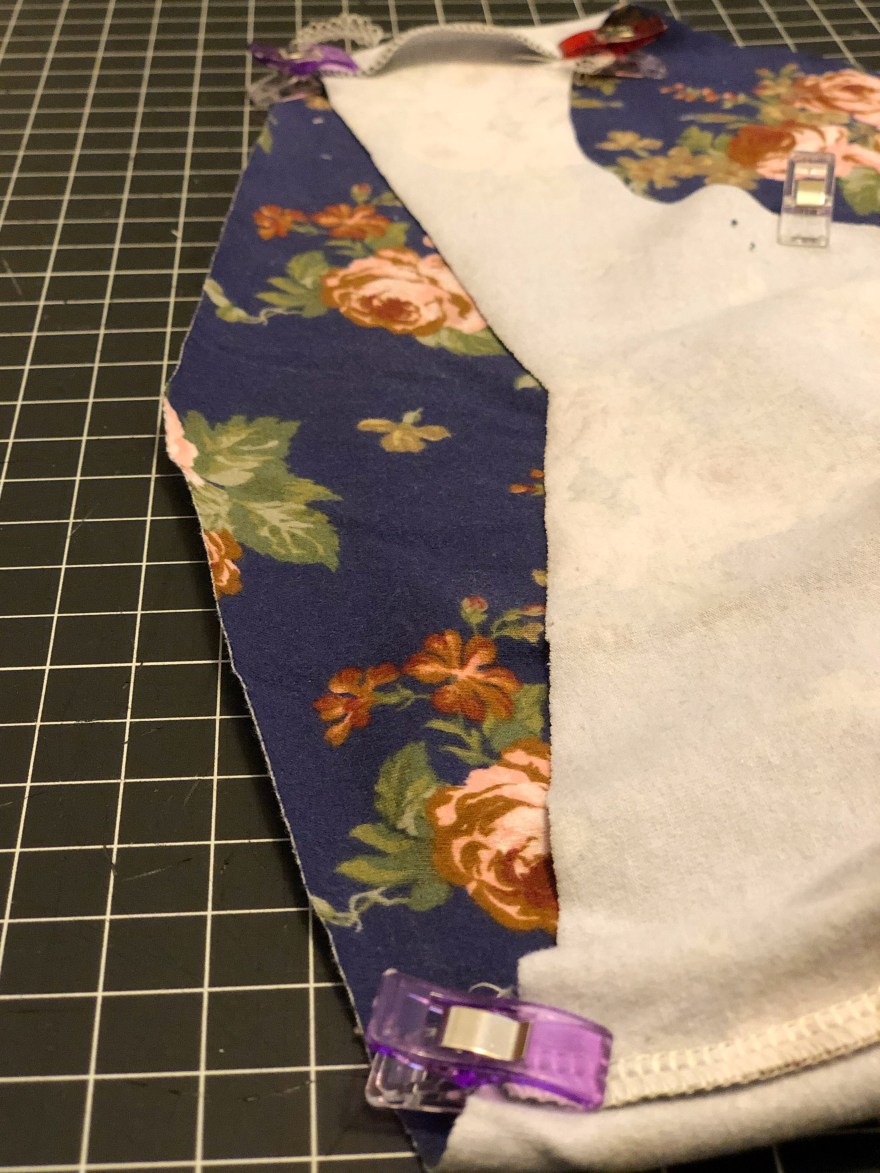
Bring the purple clips together, lay flat. Where the fabric folds in the back, place a clip (this is the back, where the serged band seam will go, so I use red clips here). Where the fabric folds in the front place a clip (this is the front so I use a pink clip).
Now match your clips! I find that its easiest with the body piece inside out, placing your bands inside.
Lastly, sew! When you do this, you will need to stretch your band to fit the body piece, but you want to try to not stretch the body piece. *you will know that you stretched the body piece if it comes out wavy after you sewed. 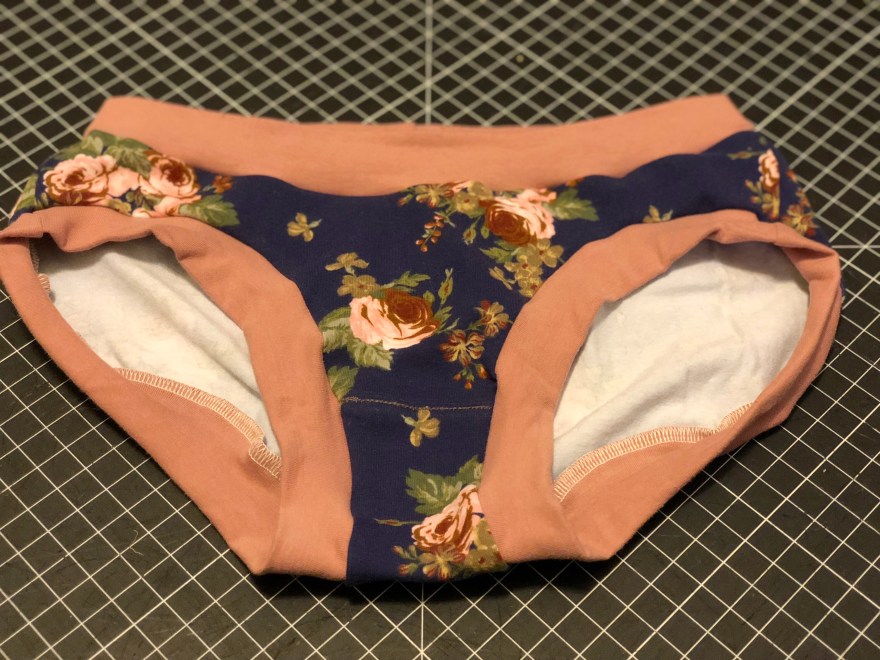
Congrats! You did it!!! Not only will your buns thank you for the comfy fitting undies you’ll be getting your skills mastered for when you want to make a clothing item that more people will see (like a shirt, pants, etc).
Now if you want to make some for your kids sign up to follow the blog so you can read my next blog post of tips for kids undies!

One thought on “Starting to Sew? Revamp your Undies”